
Outdoor solar lights are a brilliant fusion of sustainability and practicality, illuminating gardens, pathways, and driveways with energy harnessed from the sun. However, even the best solar lights can falter over time due to environmental factors, wear and tear, or simple oversights. If your solar lights have dimmed, flickered, or stopped working entirely, don’t despair—this detailed guide offers 16 expert tips to breathe new life into them. Beyond basic fixes, we’ll dive into the science behind solar light functionality, explore nuanced troubleshooting techniques, and provide preventative strategies to keep your lights shining bright for years. Whether you’re a novice or a seasoned DIY enthusiast, this enriched, step-by-step exploration will empower you to restore and optimize your solar lighting system.
Why Solar Lights Fail—and How to Fix Them
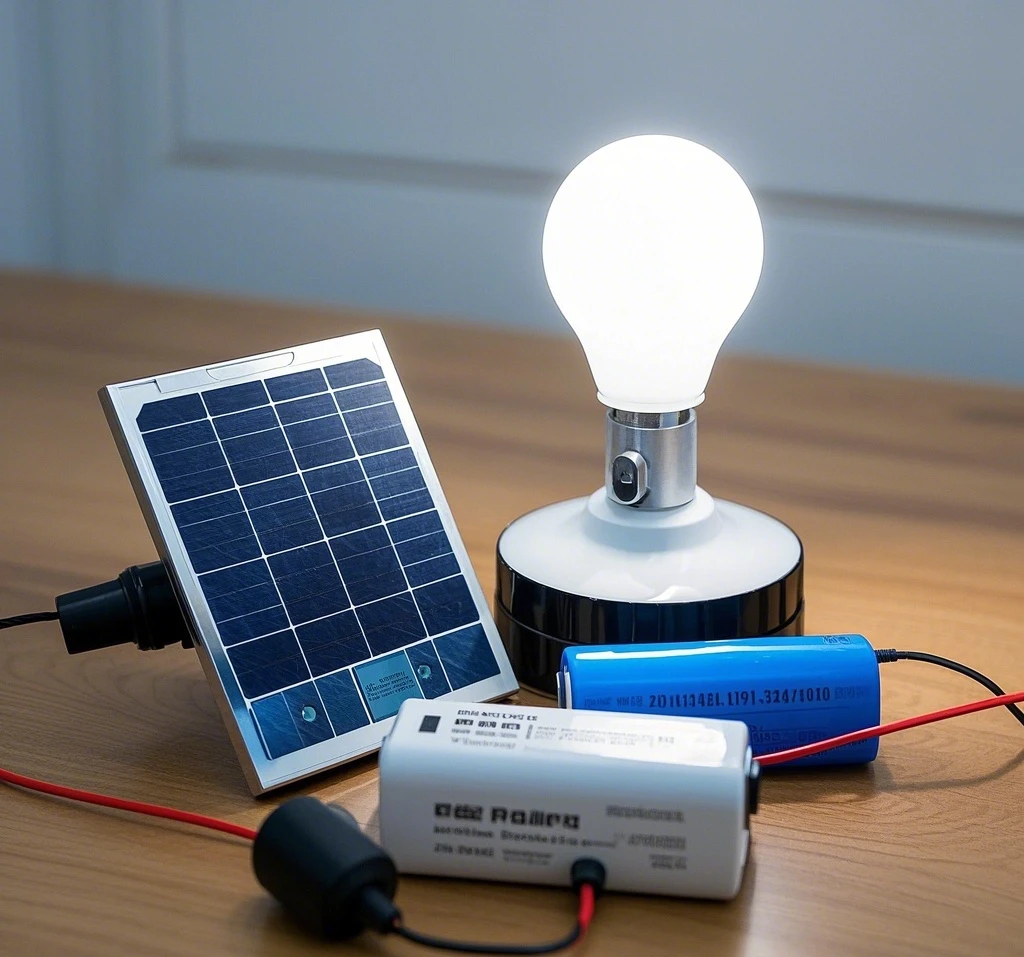
Solar lights rely on a delicate interplay of components: a photovoltaic (PV) panel to capture sunlight, a rechargeable battery to store energy, an LED to emit light, and often a sensor to control operation. When one element falters—be it from dirt, poor placement, or component wear—the entire system can stumble. This guide not only addresses common issues but also equips you with deeper insights into how these factors interact, ensuring you can diagnose and resolve problems with confidence.
Let’s explore these 16 tips, each expanded with practical advice, real-world context, and proactive measures to maximize your solar lights’ performance.

Cover That Panel: Simulate Nighttime to Test Functionality
Solar lights are designed to charge during the day and activate at night, guided by a light sensor that detects ambient brightness. If your light refuses to turn on after dusk, a simple trick can reveal the issue: cover the solar panel with an opaque material (e.g., a cloth or your hand). This mimics nighttime conditions, prompting the light to switch on if it’s functioning correctly. If it lights up, the problem might be external light pollution—like a nearby streetlamp—tricking the sensor into thinking it’s still daytime. Adjust the panel’s position slightly, perhaps tilting it away from artificial light sources, to resolve this. Pro tip: Regularly check for new light sources (e.g., a neighbor’s porch light) that might emerge over time and disrupt your setup.
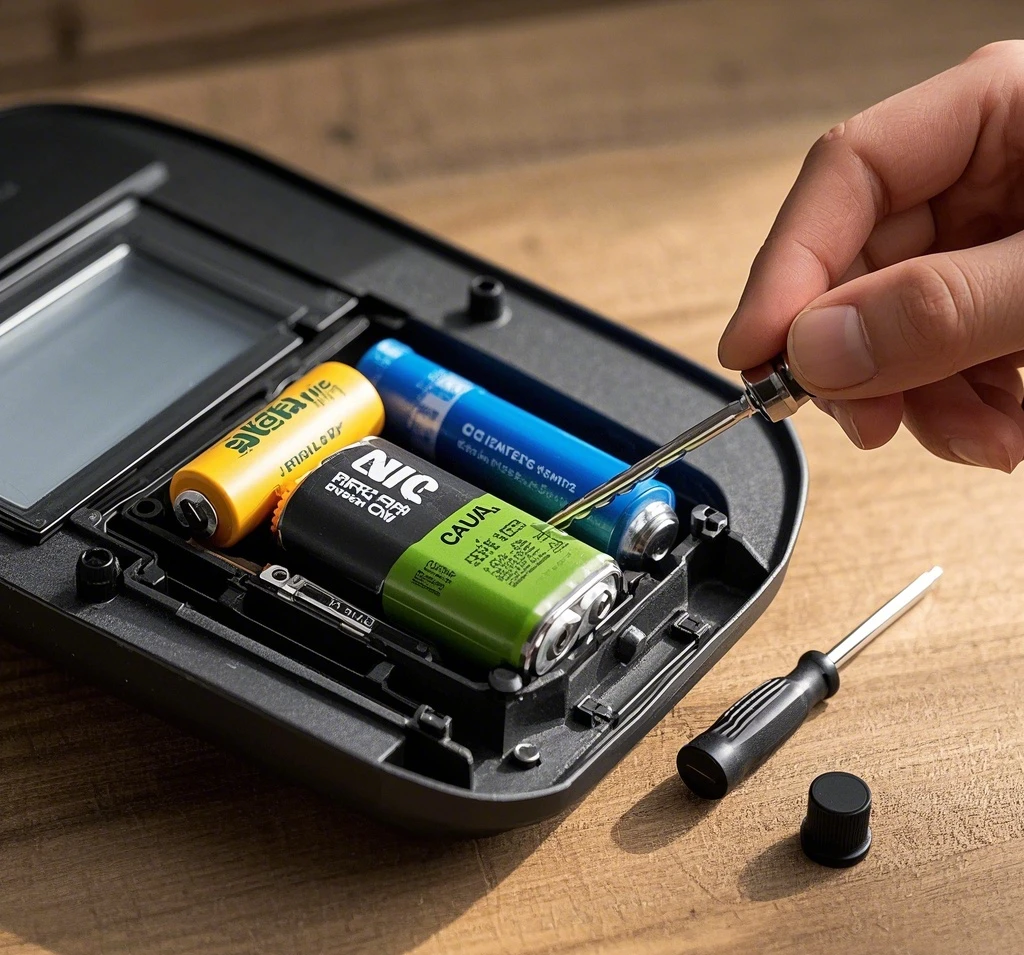
Replace Those Batteries: Restore Power with Fresh Cells
Inside most solar lights, you’ll find rechargeable batteries—typically nickel-metal hydride (NiMH) or lithium-ion (Li-ion)—that power the LED by night. Over time, these batteries lose their capacity due to repeated charge-discharge cycles, a natural process called battery degradation. Symptoms include shorter runtimes (e.g., lights dimming by midnight despite a sunny day) or failure to hold a charge. Most quality batteries last 1–2 years, though exceptional cases can stretch to 6 years with optimal conditions. To fix this, replace them with compatible rechargeable batteries (check the manual for specs like voltage and size, e.g., AA or AAA). For longevity, store spares in a cool, dry place and avoid mixing old and new batteries, which can imbalance the system.
Dodge the Shadows: Ensure Unobstructed Sunlight
Shadows are the silent saboteurs of solar lights, especially around midday when sunlight is strongest. A panel shaded by trees, buildings, or even seasonal foliage can see its energy harvest drop by up to 50%. Every 3–4 months, inspect your lights at noon to assess shadow patterns—summer installations with short shadows can become problematic as the sun dips lower in autumn and winter. Relocate the light or trim overhanging branches to restore full exposure. For a proactive approach, map your yard’s sun path annually using a smartphone app like Sun Seeker to anticipate seasonal shifts.
Is That the Best Angle? Optimize Panel Tilt for Efficiency
The angle of your solar panel significantly impacts its efficiency, particularly in winter when the sun hugs the horizon. A flat panel might suffice in summer, but a 45-degree tilt in winter can capture 20–30% more sunlight by aligning with the sun’s low arc. Adjustable panels are ideal—experiment with angles between 30–60 degrees depending on your latitude (closer to vertical the farther north you are). Test runtime after adjustments: a well-angled panel can extend illumination from 6 to 10 hours on a single charge. Fixed panels? Consider a small mount to tweak their position seasonally.
South Facing? Maximize Solar Harvest with Directional Precision
Like a satellite dish tracking a signal, a solar panel performs best when oriented toward the sun’s path. In the Northern Hemisphere, this means facing south to soak up rays from sunrise to sunset. East- or west-facing panels still work but may lose 10–20% efficiency, while north-facing ones can struggle significantly. Use a compass (or a smartphone app) to align your panel due south, adjusting for any magnetic declination in your area. Even a 15-degree deviation can make a difference, so precision pays off—your lights will thank you with longer, brighter nights.
Water Ingress: Combat Moisture Damage
Waterproofing is a common weak spot in solar lights, even those with decent IP (Ingress Protection) ratings like IP65 or IP67. Rain, sprinklers, or humidity can seep into poorly sealed units, shorting circuits or corroding batteries. Signs of water damage include flickering lights or complete failure. To fix, disassemble the light (if possible), remove any covers trapping moisture, and dry it in a warm, airy spot—like a hot water cupboard—for 48 hours. Reassemble, ensuring tight seals, and test after a full charge. Prevent future issues by adding silicone sealant around seams or choosing lights with higher IP ratings (IP68 is top-tier). Check warranties—reputable brands often replace water-damaged units if installed correctly.
Hungry Squirrels? Protect Against Wildlife Damage
Wildlife can wreak havoc on solar lights, especially string lights with tasty wires. Squirrels, birds, or even deer might chew through cables, leaving you with a dim or dead setup. Inspect for bite marks or frayed wires—minor damage can be patched with electrical tape and patience, but extensive harm may require spare parts from the manufacturer. Preventatively, wrap exposed wires in critter-proof conduit (available at hardware stores) or hang lights higher out of reach. For tree-mounted strings, leave slack to reduce wind-induced tension, which can exacerbate chew damage.
On/Off Switch: Don’t Overlook the Basics
It’s a rookie mistake even experts make: forgetting the on/off switch. Not all solar lights have one, but if yours does, ensure it’s flipped to “on.” Test it by covering the panel—if the light glows, you’ve found the culprit. Switches can be subtle, so consult the manual or feel for a toggle under the panel. If it’s stuck or broken, a gentle nudge with a small tool might free it; otherwise, contact the manufacturer for a replacement. This simple check can save hours of frustration.
Passive Infra-Red (PIR) Dials? Fine-Tune Motion Detection
Advanced solar security lights often feature Passive Infra-Red (PIR) sensors with adjustable dials for sensitivity and range. If your light ignores motion or triggers too easily (e.g., from a passing cat), tweak these settings. Start with maximum sensitivity, then dial back until it responds only to desired triggers—human movement at 20 feet, not a breeze at 5. Test at night with a helper to simulate motion, adjusting incrementally. Height and angle matter too: a PIR at 6 feet catches more than one at 2 feet. This trial-and-error approach ensures precision without wasted energy.
Lux Sensor Dial? Control Light Activation Threshold
The lux sensor governs when your light activates based on darkness levels. If it stays off despite nightfall (due to nearby lights) or turns on too early (in shade), adjust the lux dial. Set it to a lower lux value for darker activation thresholds or higher if ambient light is tricking it. Test by covering the panel and observing the response under varying conditions—like dusk versus midnight. This customization prevents false positives and conserves battery life, especially in urban settings with competing light sources.
Battery Seating/Strip: Secure Connections for Power Flow
Loose batteries are a sneaky issue, often dislodged during shipping or installation. If they’re not firmly touching the terminal contacts, the panel can’t charge them, and the light won’t shine. Open the compartment, reseat the batteries, and check for bent or corroded terminals—clean with a vinegar-dipped swab if needed. After reseating, give the light a full day to charge before testing. For stubborn cases, a thin strip of conductive tape can bridge minor gaps, but replace damaged contacts via the manufacturer if possible.
Charging Behind Glass: Avoid Sunlight Barriers
Charging a solar panel behind a window seems logical, but glass—especially double- or triple-glazed—filters out much of the UV and infrared light needed for efficient charging. This can cut energy harvest by 30–50%. Always place the panel outdoors in direct sunlight, free from obstructions like awnings or eaves. If indoor charging is your only option (e.g., for a balcony light), use a south-facing sill with single-pane glass and expect reduced performance. Outdoor exposure remains the gold standard.
Is It Plugged In? Verify Remote Panel Connections
Lights with detachable solar panels rely on secure cable connections. If the panel’s cord is loose or unplugged, no power reaches the battery or LED. Check the plug—tighten waterproof connectors if present—and inspect for fraying or water damage. A firm push might solve it; otherwise, test continuity with a multimeter (if you’re handy). For integrated designs, ensure internal wiring hasn’t shaken loose during installation. A quick reconnect can resurrect a seemingly dead light.
To Solder or Not to Solder? Weigh DIY Repairs
Frayed wires or broken connections tempt the DIYer to grab a soldering iron, but proceed with caution. Soldering can fix minor issues—like a snapped fairy light strand—but risks voiding warranties unless pre-approved by the manufacturer. Contact them first; many offer spares or replacements to avoid landfill waste. If you solder, use a low-heat iron (e.g., 25W) and lead-free solder, testing after a full charge. For novices, electrical tape is a safer interim fix while awaiting professional support.
If All Else Fails, There’s Always the Mains: A Last Resort
Tempted to plug in a mains charger or swap batteries for a quick fix? Resist unless your light explicitly supports it (check the manual). Solar circuits are tuned to specific voltages (e.g., 1.2V for NiMH, 3.7V for Li-ion), and a mismatched charger can fry components or overcharge batteries, necessitating a full replacement. If removable batteries are labeled and you have a compatible charger, a one-off boost might work—but for consistent results, optimize solar charging with better placement. Mains power is a fallback, not a solution.
Grubby Solar Panel: Clean for Peak Performance
Dust, pollen, or road grime can coat your panel, slashing efficiency by up to 30%. In urban or dusty areas, this buildup accelerates, dimming your lights over months. Wipe the panel monthly with a damp cloth and mild soap, rinsing and drying thoroughly to avoid streaks. For stubborn spots (e.g., bird droppings), a vinegar-water mix (1:1) works wonders. Regular cleaning not only restores brightness but also extends component life by reducing strain on the battery.
Beyond Troubleshooting: Preventative Care for Longevity
Reviving your solar lights is just the start—keeping them operational requires ongoing vigilance. Here’s how to stay ahead:
- Seasonal Checks: Reassess angles and shadows quarterly as the sun’s path shifts.
- Weatherproofing: Add silicone sealant to vulnerable seams before leaks begin.
- Battery Maintenance: Swap batteries every 18–24 months, even if they’re still working, to preempt failure.
- Warranty Leverage: Document issues with photos and contact manufacturers within the warranty period (typically 12 months) for free replacements.
The Bigger Picture: Why It Matters
Restoring your solar lights isn’t just about convenience—it’s a small victory for sustainability. Each functioning light reduces reliance on grid power, cutting your carbon footprint by ounces daily that add up over years. Plus, avoiding premature disposal keeps electronics out of landfills. At SolarCentre, where we’ve crafted solar lights for over a decade, we pair cutting-edge panels and LEDs with durable designs to ensure longevity—a ethos you can emulate with these tips.
Light Up Your World
With these 16 enriched tips, you’re equipped to troubleshoot, repair, and optimize your solar lights like a pro. From covering the panel to test sensors to soldering with care, each step builds on the last, offering a layered approach to revival. Whether your lights are flickering faintly or stubbornly dark, patience and persistence will see them glow again. So, grab your tools, step outside, and reclaim the night—your solar lights deserve a second chance, and your outdoor space will shine brighter for it. Have a unique fix that worked for you? Share your story—we’d love to hear it!
Comments
您好,这是一条评论。若需要审核、编辑或删除评论,请访问仪表盘的评论界面。评论者头像来自 Gravatar。